 Read More: Best Wedding Invitation Deals
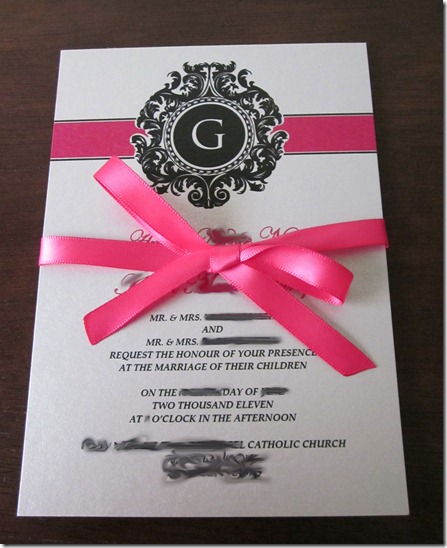
One wedding expense that I saved quite a bit of money on was by making homemade wedding invitations. I scoured websites and craft stores for months before deciding to make my own. The only wedding invitations I could find that I liked were way over my budget, or the inexpensive invitation sets were too simple or bland. My homemade wedding invitations look beautiful and unique, and they fit my style. And, on top of that, they look like expensive invitations, but I only spent about $250 on 200 wedding invitation sets (about $1.232 per set).
Here’s how I made my homemade wedding invitations:
Step 1: Download and customize a template
I used on online template that I found at DownloadandPrint.com.
(NOTE: You could skip the rest of the steps and upload your document to Vista Print and they’ll print them for you for much cheaper. Looking back, I could have saved a lot of time and some money just uploading the template to a blank invitation.)
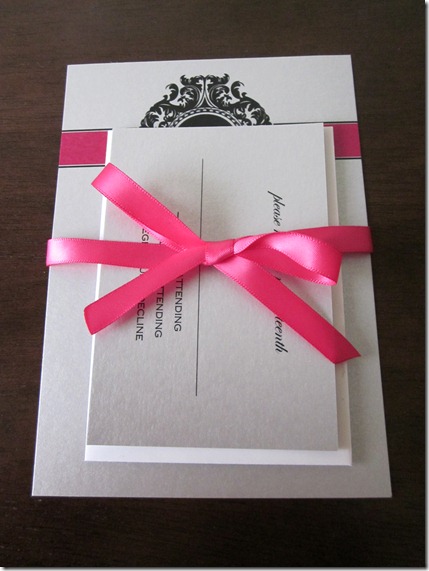
I used the Framed Monogram template for my wedding invitation. I loved the hot pink accents and the crest at the top of the invitation. I hadn’t seen any other templates like this, so I liked that it was something different – not another simple white invitation.
I adjusted the wording and rearranged the placement of words. I also spent quite a bit of time formatting our initial in the crest/monogram at the top. Originally, the middle of the crest printed as a pale grey color. I had to create a circle shape in Microsoft Word, fill it black, and THEN place the letter “G” over it so that it would print all black with a “G” over it. It took time, but it was worth it.
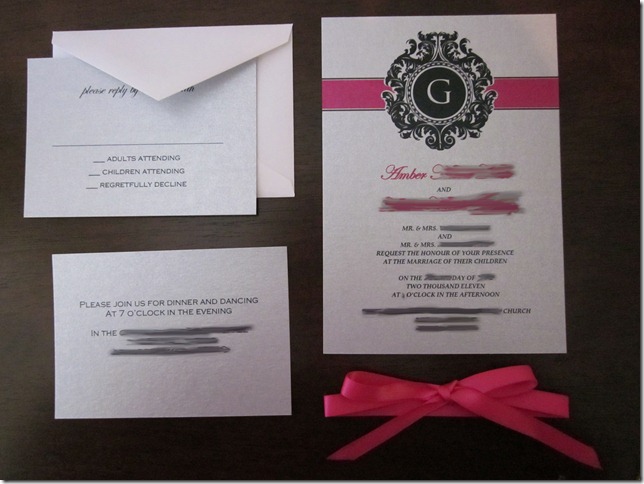
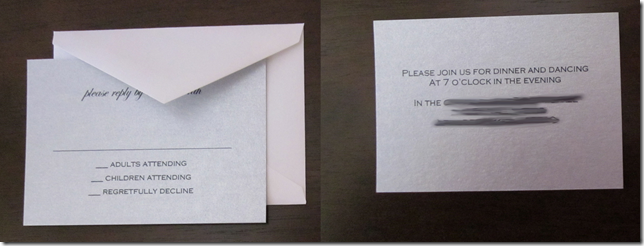
I used the Blank RSVP Card template for both the RSVP and the reception cards (it doesn’t have it’s own page, it’s only a link on the page).
The main reason I even used a template for the RSVP cards or the reception cards was for the cutting lines that you see when you open the template. Other than those lines, I typed up everything on my own for these templates. (Hint: To do this, you’ll have to be somewhat crafty in Microsoft Word … it took me quite a bit of time to get it all exact.)
Hint: Convert your Word document to PDF after you customize but before you print. It prints much better that way!
Step 2: Choose your cardstock and envelopes
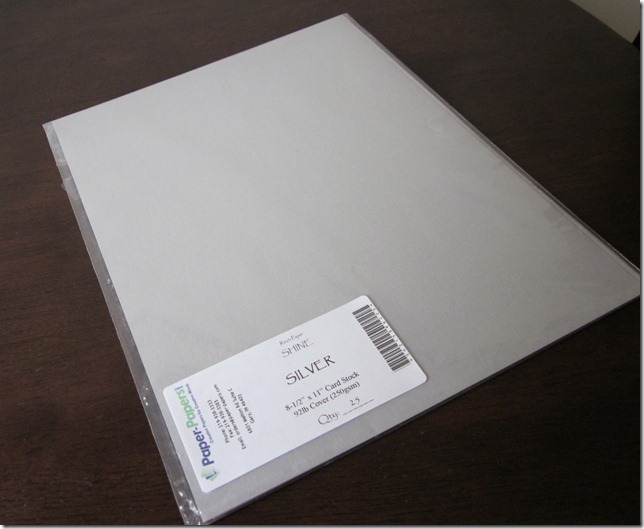
Since I printed all my invitations at Kinkos/FedEx Office (in a later step) and their supplies are limited, I bought all my own cardstock. I chose a 92lb weight silver/metallic cardstock. I love the look of a shiny, silver cardstock and this cardstock was perfect. It may be hard to tell in the pictures, but it’s shiny, silver and metallic. 🙂
I ordered the card stock from Amazon.com.
The cardstock came in packages of 25 at $7.31 per package, so I ordered 8 packages (since 4 RSVP/reception cards and 2 invitations could be printed on each page).
I also bought the envelopes at Amazon.com. I needed to buy both the outer envelope (5 1/4” X 7 1/4” silver-lined envelopes) and the RSVP card envelope that will be mailed back to us (3 5/8” X 5 1/8” Polar White envelopes — no longer available).
There are tons of options for envelopes! They have metallic envelopes, matte-colored envelopes, plain envelopes, foil-lined (like I bought), and on and on.
Step 3: Bring your customized template and cardstock to a printing store
The best part about printing at FedEx Office? That I could bring in my own flash drive (highly recommended) and have them print the actual files from it.
The employees at the printing store were hesitant at first about printing such deep color on such heavy cardstock weight (normal is 65lb), but it worked PERFECTLY! The color on my invitations is perfect. The pink turned out to be the deep pink that I was hoping it would be.

The key here is to be SUPER nice and appreciative so the people at the printing store will do the best work for you (I really laid it on thick with “You just made my day!” and “You’re awesome!” lines … both were true, so no harm done).
Why do you need them to do the best work? Because after they print your beloved invitations, they’re going to cut them for you.
Hint: You MUST use a printing store that has a guillotine cutter and a person that knows how to use one.
I’m not sure how hard it is to work one of those guillotine cutters, but I’m guessing it takes some sort of skill and I wanted the person cutting my precious wedding invitations to be on their best game. (Shout out to Jessi, who cut my invitations perfectly.)
Step 4: Add the ribbon (Optional)
After everything was printed and cut, I felt like the set needed a little something to tie it all together. I decided to purchase matching pink ribbon (from Hobby Lobby or Michael’s or any other craft store) to tie around the invitation sets.
This step is not for the impatient person! I found that out the hard way because I am that person. 😉
When I started cutting the ribbon (hint: use industrial scissors or your cuts will look really bad), I realized that the ends would fray pretty quickly. After a quick Google search, I found out that there are one of two ways to prevent the fraying:
- buy something call Fray Check to apply to all the ribbons, or
- singe the ends of the ribbon with a candle
Option #2 sounded right up my alley (mostly because I didn’t want to go to the craft store again to buy another product I’ll only use once).
Singing the ribbons turned out to be a lot easier than I thought! It just takes time and practice.
To singe (without burning), just wave the end of the ribbon quickly through the candle flame or just above/to the side of it. It takes some practice, but after I got the technique down, I moved through the ribbon pretty quickly (mostly while watching Netflix).
Although this step is tedious, I am very happy with the final results. The wedding invitation sets look “complete” now:
Step 5: Tie ribbon, address envelopes, stamp, and mail!
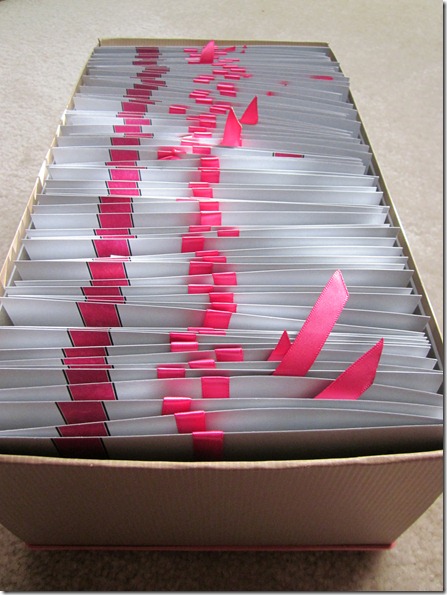
Lucky for me, I was able to assemble an army of elves to help me tie most of the wedding invitation sets. It takes awhile, but it can be good family fun if you all do it together. 😉 (Free, too!)
I actually addressed all the invitations myself. I wrote my parents’ address on the back of the outer envelope, the front of the RSVP envelope, and the guests’ addresses on the front of the outer envelope. I like writing and my handwriting seems to be my only artistic talent, so I wanted to do that on my own. Plus, it gave the invitations a personal touch that labels don’t have. (I recommend labels, though, if you don’t like writing or if you don’t like your handwriting.)
At this point, I just need to purchase the correct amount of postage and play the waiting game until the invitations are ready to be mailed (about 6-8 weeks before the wedding). I have a suspicion that I can use postcard stamps (they’re cheaper) on my RSVP cards, but I’ll probably need at least 2 stamps on the actual invitation. After I buy the postage and slap it on the envelopes, I’ll be ready to go!
Closing Thoughts and Helpful Hints
The process took a long time, but I don’t feel like it took much longer than regular invitations would (you still have to address and assemble those). I feel like wedding invitations in general take a lot of assembling, planning, and work.
These invitations are unique and just so “me” that I wouldn’t have had it any other way. I love, love, love the invitations, so it was definitely money well spent.
I needed a lot of invitations, but if you’re having a smaller wedding (100-200 people), your total cost would be considerably less. Also, the ribbon, cutting, and printing prices are local prices.
Cost Breakdown:
- Cardstock (8 packs of 25): $58.48
- Envelopes (2 boxes of 250): $48.98
- Shipping/Taxes: $17.20
- Ribbon (12 spools): $232.31
- Printing/Cutting: $103.45
TOTAL COST: $257.42
COST PER INVITATION SET: $1.232*
*For about 200 invitations. I have a lot of leftover envelopes and cardstock (Set of 50pcs). The total cost does not include postage.
What are your thoughts on homemade wedding invitations?



Waaaahhhhooo for weddings!!!
I just bought my invitation box sets yesterday. One of our friends who makes wedding invitations has offered to typeset, and print our invitations for free!! All she has requested was a printer ink cartridge to print them. She does freelance design so she has a ton of awesome fonts etc!
Each box set contains the invitation, envelope, ribbon, response card and envelope. $ 54.99 each, minus 50% off. We purchased 2. with tax the 2 box sets came to 63$
There is 60 invitations in the box set and 2 testers and we only require 51 invitations. So were doing pretty good. Cost per invite 1.23$ plus a ink cartridge.
Stop by my website.
http://becomingmrsnelson.blogspot.com
Amber: 200 invitations ??? you must be having a massive wedding!!! How many people do you have invited?
Wow those are beautiful! Thanks for the how-to, I’ll have to look up this post when we finally tie the knot.
Oooh! Those are wicked cute.
Great idea!
great idea!!!!!!!!!!!!!!!!!!!!!!!!!!!! i just love it…………….
Your invites are beautiful!!
We did our own invites for our wedding too and yes, it took a very long to design, format, print, cut, assemble etc but at the end of the day, the invites represent us perfectly that we wouldn’t have it any other way. We saved tonnes too! Our save the dates, invites, thank you cards, place cards, programs, bonbonnieres, menu and readings (all the paper goods, basically) came to $330. This was for 50 guests so average per person was $6.60. We thought we did really well!
Thanks, Rubee! I think wedding invitations are tedious no matter if you make them yourself or buy them. You still have to type in all the information and pick out designs, envelopes, address the envelopes, etc. Plus, making your own just saves SOOO much! Nice job on your invites!
These are gorgeous. I woudn’t have known they were homemade had you not told me. What else did you make on your own for the wedding? I’m kind of curious now. =)
Thanks, Jaime! This was pretty much the only thing I made for the wedding. 🙂 I tied ribbon on the bubbles and things like that, but this is about the extent of my artistic ability! 🙂
Those are beautiful. I love the pink – very bold yet classic. You are really crafty.. I probably would have given up around the 5th invitation. LOL.
Thanks, girl! They were super easy. Typing up stuff in Word is my job anyway, so it was pretty easy. 🙂 I just dropped off at Kinkos and they were ready in an hour or so. It was great!
Those are beautiful but a lot more work than I would have wanted to put in them. Mine look similar but I created them online at 123print.com. I paid $125 for 200 invitations with save the date cards, free envelopes, thank you cards included. So easy and they turned out so pretty. All I had to do what press order and they printed them for me and sent them to my house within the week.
Same for me! I just dropped me flash drive off at Kinkos and they were ready within an hour or so. 🙂 It was nice, too, because she let me test out one before I spent the money on the rest. I would have been mad if I would have printed them all and didn’t like them! Did you add ribbon or have RSVP cards or reception cards? I did check out 123print and vistaprint, but couldn’t find any that fit my style.
Oh, that’s so great that you got to see them before they printed the entire order. Vistaprint was able to send me a sample of the cards I was order but they didn’t have my wording on them. I did tie a ribbon around them which took the most time but I think it really adds a little something special. We did RSVP cards but didn’t do reception cards as they aren’t really popular around here. If I had done them people wouldn’t have know what they were for, haha.
These are AMAZING! Love the style and the colors, woohoo hot pink! I also would never have guessed those were homemade. Way to go, girl! 😀
Beautiful invitations!! I will definitely have to refer back to this when my big day comes. Thanks for sharing!
These are beautiful and I wouldn’t have been able to tell they were home made if you hadn’t told me!
I guess wedding invitations of any sorts will be tedious. I remember how long my friends spent on hers and her’s were made by someone else. So many choices and templates.
Wow, I love those invitaitons! Really looks professional! I actually passed it onto my friend whose getting married in Dec 2012, just for ideas and if she decided to handmake her ones too.
Just beautiful and bookmarked it myself too! (Just in case for my future wedding and for ideas/inspiration) =)
Again, simply amazing!~
This is my first time coming to this website and I must say that I am very impressed with your invitations. my wedding is the first of october and I just found out yesterday:) lol ..do you have anymore tips assuming I only have 4 months
Thanks for the info. Great idea!
I thought it was helpful. I am trying to save as much money as i can.I may actually do this now.
well then i guess im a keeper, aside from scouting locations, coming up with our cake design, and picking some of our ceremony/receptions songs i’m researching the invitations right now for my fiance. She’s a design art student so between her design skill, and my skills with word processing this shouldn’t be hard at all. Also considering getting her aunt to help considering she always make her own cards. I’m looking forward to it!
Hi Amber,
I’m seeing that it’s been quite some time since you’ve been on this site, but I was wondering about the crest with initial on the monogram you have on your invites – it is absolutely fantastic!! Would it be possible to share the template that you used – my initial is also going to be “G” so it would be perfect and then we can modify the invitation to be our own. Let me know! Thanks, Melanie
I always make my own invitations. I’m making wedding invitations for a friend. She picked the exact same paper you did. We are also going to use it for the programs, and other things. Her invitations are about $1 each (including the foil envelopes). I have a design background and access to my own laser printer. Part of her wedding gift is the making/printing. No trip to Kinko’s for her that way.
Doing your own is so much better. Something people are going to throw away later should not be so darned expensive.
Hello there! I love this idea and saving money makes it so much sweeter. I tried going to the website downloadandprint.com, howeve it charges $25 to access the type of invitation template you show here. Is there any way around that and did you pay for that? Thanks a bunch!
-Denise
[…] costs are a close second to the wedding budget. Again, book as early as you can, especially if the wedding takes place in a small town, and the options will fill up quickly. Don’t be too cheap and opt for […]